My first attempt at documenting the brew session. I brew alone, so cut me some slack with the photos. Here's what we want to do in a nutshell: mix warm water with crushed grain to produce sugary liquid (wort); separate this wort from the grains; ferment this liquid with yeast to make beer.
You can't make beer with cold water, so first thing's first, we've got to heat it up the strike water to around 165F-170F. This water will be added to the crushed grain to start the process. There's about 2.5 - 3 gallons in the pot. I brew by feel and don't like to measure when I think I don't need to measure. After all this is "HAPPY BREW WITH NICO!"
Here's the strike water heating. It's filtered water, so I've added 2 Tbs. Calcium Sulfate and 1 Tbs. Gypsum. These compounds are necessary for enzymatic activity and proper fermentation. I won't say more than that at this point. The wire is a thermometer that I stole from my parents because it was "broken." As the water is heating, it's time to crush the grain! I LOVE my barley crusher, and it has served me well over the years.
Here's the crushed grain in the blue container. I use a separate mash tun and lauter tun. It's not 100% necessary, but I've learned that there is a greater chance of getting a stuck sparge (clog) when mashing in your lauter tun. Once the strike water hits temperature, I'll add a bit to the cooler to the right, and then pour in the grain, stir, and then add more water to get an oatmeal-like consistency. I use a wooden rolling pin to mix it all up. Check out Nico's sexy foot.
Once, everything is mixed together, I'll check the temp. I'm shooting for 150F for this batch. A higher temp will give you a fuller bodied beer (up to 158F) a cooler temp will yield a more fermentable wort and thinner beer (down to around 145F). Now, it's time for the mash to sit for about an hour, so I'll get my lauter tun ready. I use a 5 gallon Igloo cooler with a stainless steel false bottom. I used to have a plastic false bottom, but it ended up collapsing after several batches. The SS bottom works great.
Many people use a copper or plastic manifold or bazooka screen instead of the false bottom. I started with a false bottom and with a fly sparge. It has served me well. If you have a larger lauter tun or one that is rectangular, you'll want to use a manifold/bazooka screen. Batch sparging may also work better with a manifold/bazooka screen.
Fast forward one hour! Time to scoop the mash into the lauter tun. I use a measuring cup. I also add about 3 inches of hot (almost boiling) water to the bottom of the lauter tun before I add the grain. This addition will help prevent the grain bed from compacting (stuck sparge prophylaxis).
Once all the mash is transferred, it's time to heat up the sparge water. I'll heat up around 5 gallons of water to a boil and then pour that into a separate 5 gallon Igloo cooler with a ball valve. Braided tubing connects this cooler to the lauter tun. I use a fancy whirlygig (again, gadget guy) to evenly distribute the sparge water over the grain bed. This isn't necessary, but it's fun. You can also use aluminum foil or a pie tin with holes poked in it. Here's the grain bed below.
Let the grain bed settle for about 10 minutes and it's time to start the Vorlauf. This process consists of running of some of the very first runnings from the lauter tun and recirculating them through the mash. It will help filter out bits of grain and clear the wort. I like to run off the cloudy liquid and then pour it back over the mash through aluminum foil. Check out the Vorlauf below.
After about a gallon, the wort will start to clear up. Above, you can almost see my fingers through the tubing. It's time to begin the sparge! Sparging is like sex...take it slow, don't rush it. I'll run my tubing into my boil kettle (10 gallon Polarware with false bottom) and let the whirlygig do its magic. Check out the pics below. If you're confused at this point, our goal is to rinse the grain and extract as much sugary wort as possible. Remember, yeast eat sugar and make alcohol.
This sparge took about 30-45 minutes. I stop once I have collected about 7.5 gallons of wort. Since I only am brewing a 5 gallon batch, I collect 7.5 gallons to account for water lost to evaporation during the 75 minute boil and to hop absorption.
Now it's time to carefully lift the giant brew kettle and place it on my Brinkman burner. I've included some pics of my boil kettle and false bottom (I LOVE IT). The false bottom will filter out hops and produce a clear wort that will be drained into our fermentation vessel.
Crank up the burner and wait for the boil! We're almost done! Right at the beginning of the boil, a hot break will occur. I like to skim off the hot break with a strainer. It's coagulated proteins, and I don't want it in my beer.
Once the hot break has cleared, it's time to add our bittering hops. In this batch, I've added .5 oz. of Magnum. A great clean bittering hop.
I will boil the bittering addition for at least 60 minutes. In this case, I will be using a 75 minute boil. Why so long? It takes time for the hop bitterness to be extracted into the wort. Ensure you have a good, rolling boil during this time.
Next, it's time to add my flavor/aroma hops. I prefer the "hop burst" technique. Hop bursting yields a ton of flavor and aroma right towards the end of the boil. I add 2 oz. of Amarillo with 10 minutes left and another 2 oz. of Amarillo with under 5 minutes left in the boil.
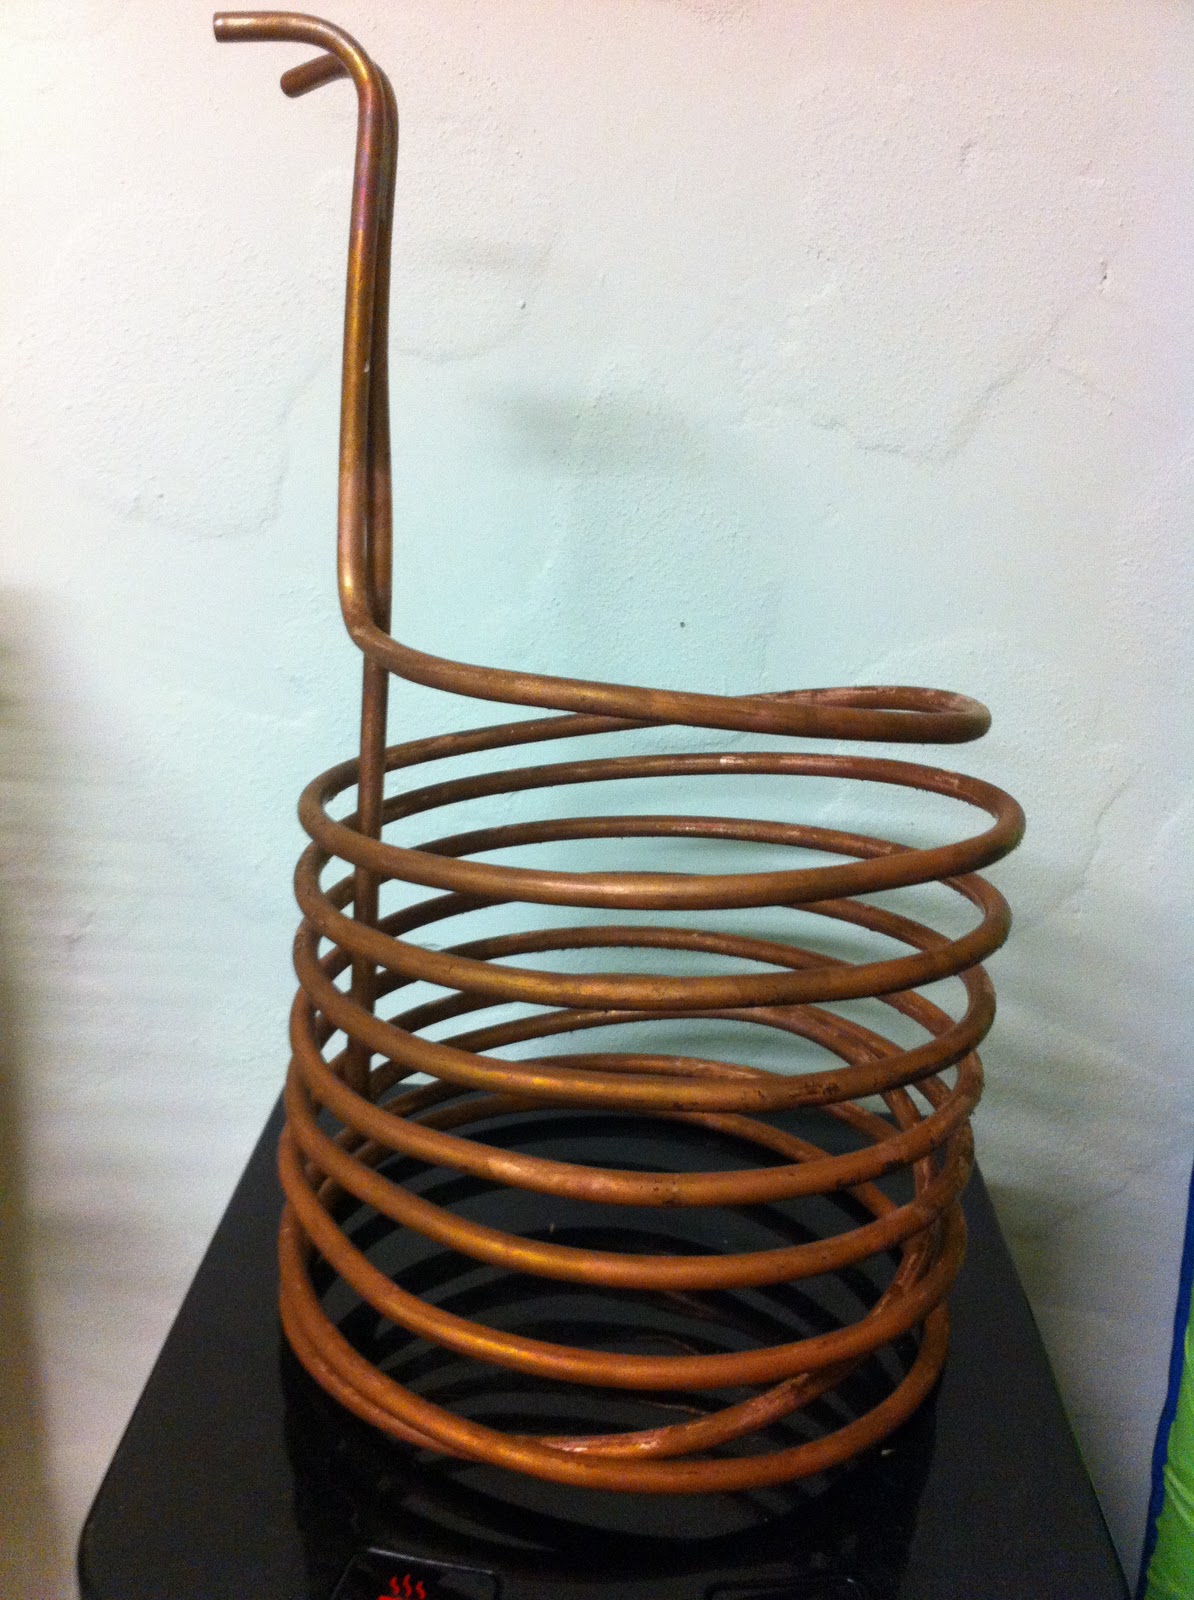
With the boil complete, it's time to chill the wort as quickly as possible. There are various reasons why you want to chill the beer quickly. I may go into this later in another post. But, maybe not, after all this is "HAPPY BREWING WITH NICO!" Above, you can see my copper immersion chiller in the boil kettle. I will hook this up to my garden spigot and pump cool water through it until the wort is around 80F-90F. I would ideally chill it to 60F, but the ground water in Florida is too warm, and I cannot afford an immersion pump/pre-chiller at this time.
Here is the beer chilling. I like to stir several times to ensure that the cooling effect is even throughout the kettle.
Once the wort is cooled to around 80F, I'll remove the chiller, stir the heck out of the wort in circles (think whirlpool) and place the kettle back on my brew shelf. It needs to sit, so that the hops and trub (gunk) can collect above the false bottom.
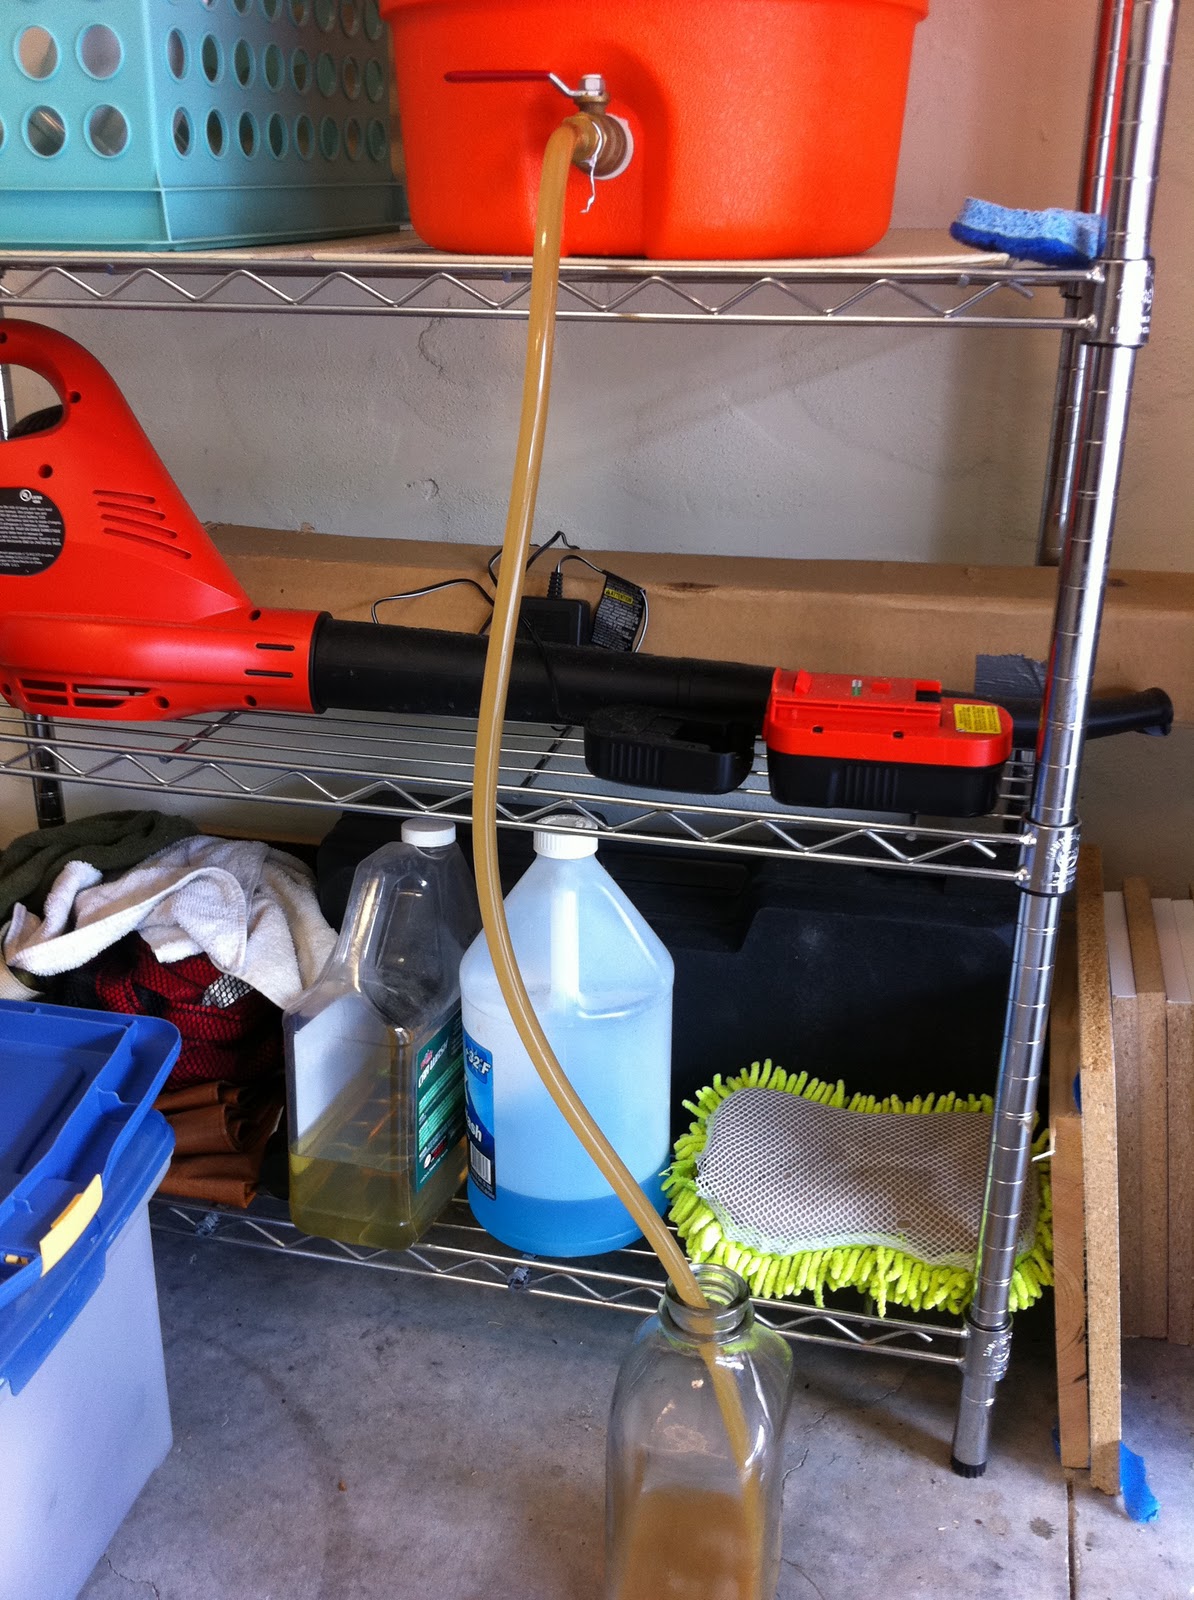
I like to clean up at this time. You can place the spent grains in your garden or give it to a farmer for livestock feed. I let the wort settle for at least 20 minutes. Then, I sanitize the ball valve, tubing, carboy, and funnel. I love StarSan. It's a no-rinse sanitizer. I pre-mix mine with distilled water and keep it in a spray bottle. Very handy. Now it's time to drain the kettle! Check out how clear my wort is!!! The false bottom and whole hops work in unison to create an amazing filter.
At this point, the 6.5 gallon carboy is nearly full, and the kettle is drained. I carry the carboy upstairs and place it in an ice water bath before pitching my yeast. Remember, the wort is around 85F at this point. WAY TOO HOT for pitching yeast. You will get a phenol laden, icky beer if you pitch this warm. I like to chill my ales close to 60F, then pitch the yeast. This ensures that I will get a clean fermentation. Check out the carboy in the ice water bath (ice has melted).
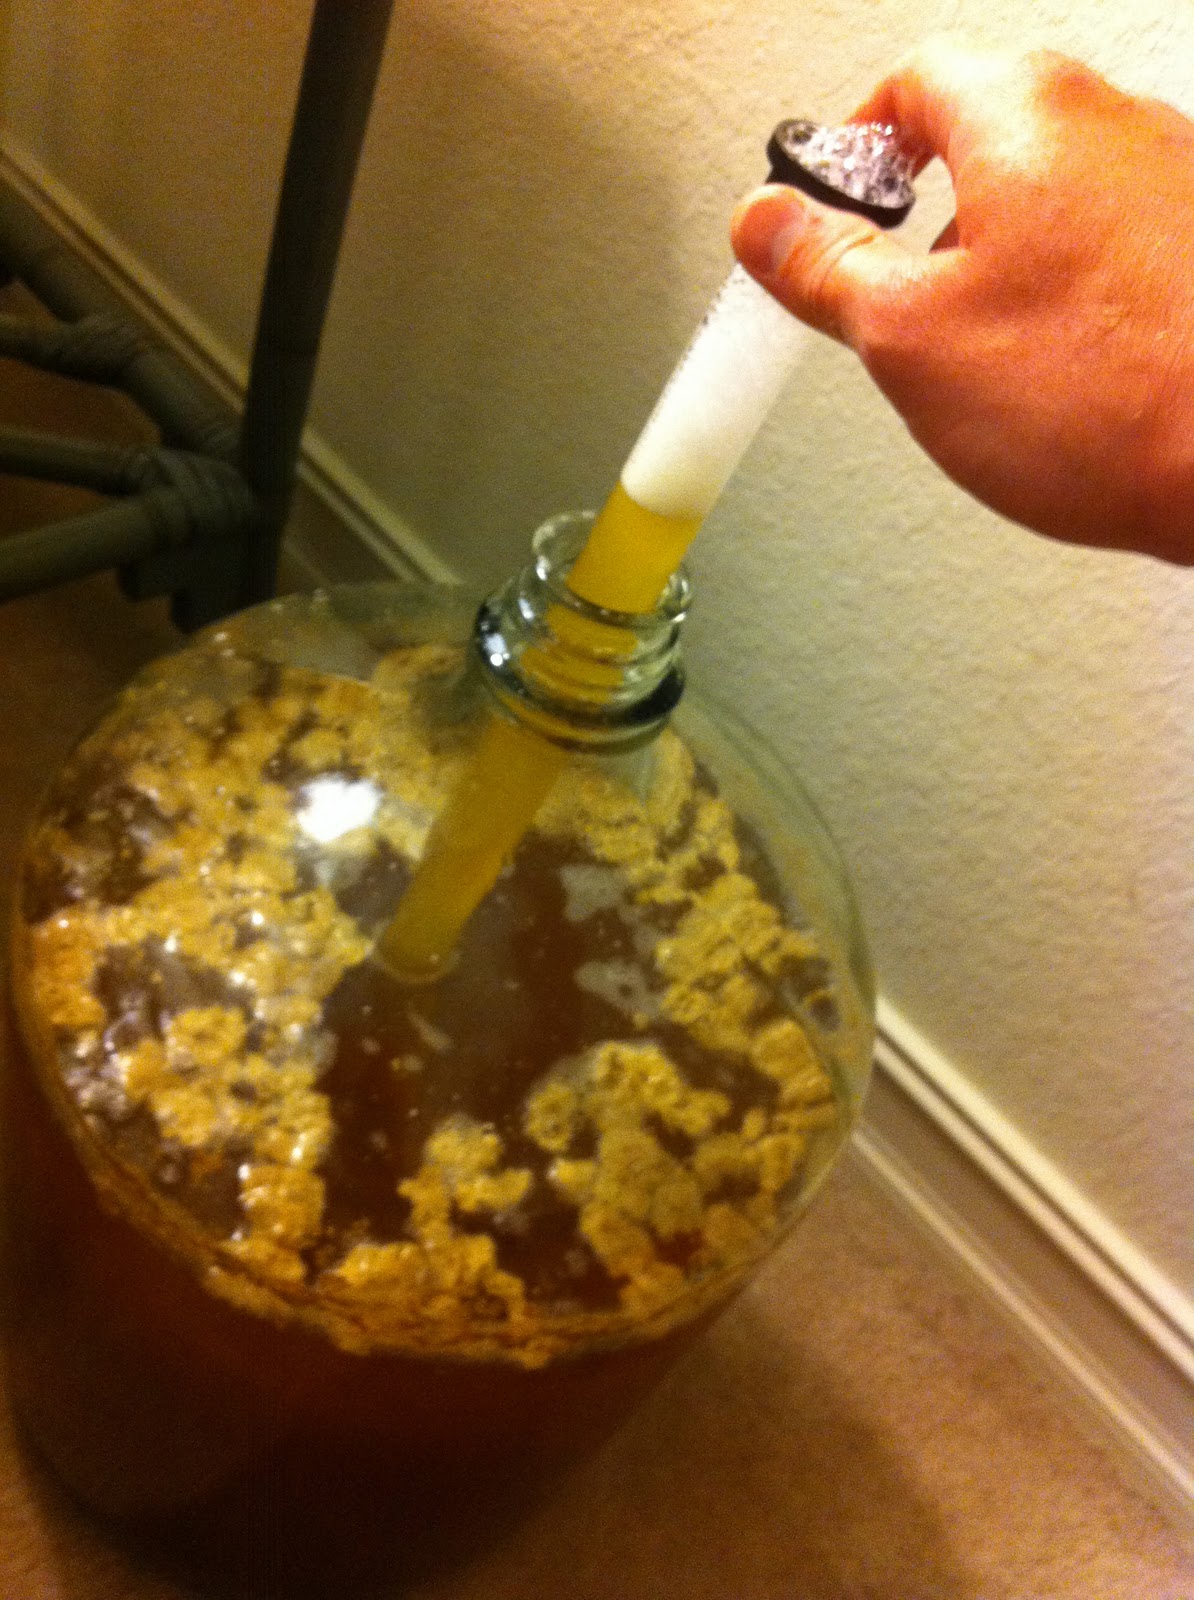
The aluminum foil around the neck of the carboy is sanitized and an easy, cheap way to keep nasties out of the fermentor. Fast forward a few hours, and it's time to pitch the yeast. Nottingham is a great, English dry yeast that produces a clean fermentation and drops out of suspension (floccs) out better than US-05. More to come on yeast in the future.
Here's a shot of the wort the next morning. Notice the yeast and foam on top. This is Krausen. I'll update the blog once I take my first sample and gravity reading. More on that to come! I forgot to take pics of the specific gravity prior to pitching yeast. Needless to say, the original gravity (OG) came out 1.048. Perfect for my tastes. I like a dry beer, so I'm expecting a final gravity (FG) around 1.012 or so.